This tutorial will walk you through setting up an InfinyOn account, and using Fluvio.
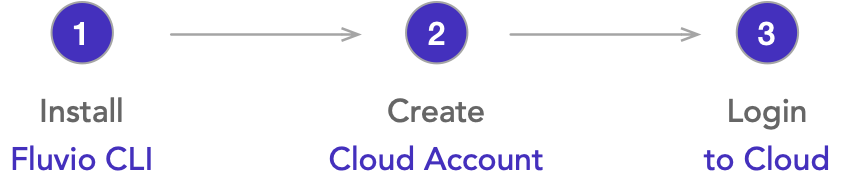
There are three main steps for setting up for the Cloud:
- Installing the CLI
- Registering for a Cloud account
- Connecting the CLI to your Cloud account
The following sections will walk you through how to do that.
Download the Fluvio CLI with the following command.
$ curl -fsS https://hub.infinyon.cloud/install/install.sh | bash
Next you will have to add Fluvio to your $PATH environment variable. There are three main shells that see common usage: Bash, Zsh, and Fish. Bash and Zsh use a similar approach to modifying the $PATH but Fish is completely different.
If you are unsure of which shell you are using, the command echo $0 will tell you:
$ echo $0
/bin/zsh
Once you confirm which shell you are using, use one of the following commands to modify your $PATH.
$ echo 'export PATH="$PATH:~/.fluvio/bin"' >> .zshrc
$ echo 'export PATH="$PATH:$HOME/.fluvio/bin"' >> .bashrc
$ fish_add_path ~/.fluvio/bin
Head over to the InfinyOn Cloud sign up page.
Currently, there are two ways to create your Fluvio account: Google sign in, and Email registration.
If you wish to avoid creating a new username and password for InfinyOn Cloud, then click on the blue Sign up with Google button.
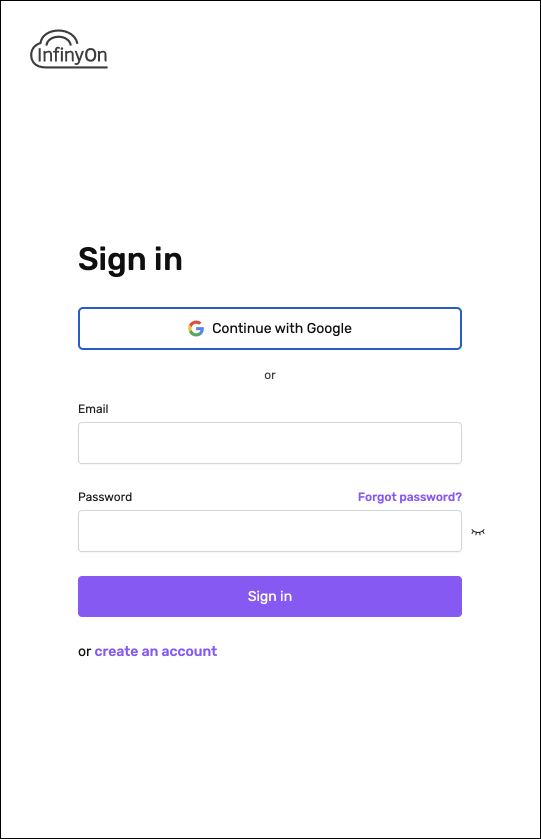
The link will take you to a Google login prompt if you are not already logged into Google.

Finally, Google will provide a confirmation screen confirming that you want to log into InfinyOn Cloud with your Google account.
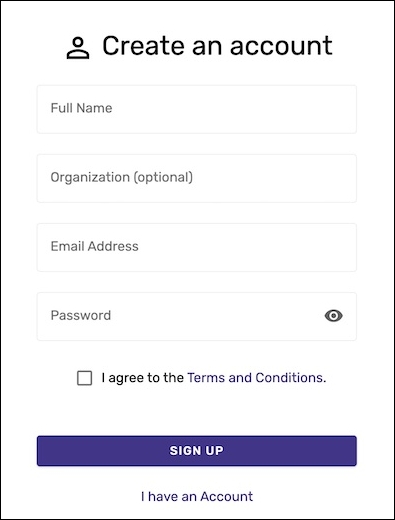
Please fill out the form with the requested information: Name, Email address, and Password to start the account creation process.
After filling out the form, you’ll be greeted with a success message requesting that you confirm your email address. You’ll need to complete this step in order to continue.
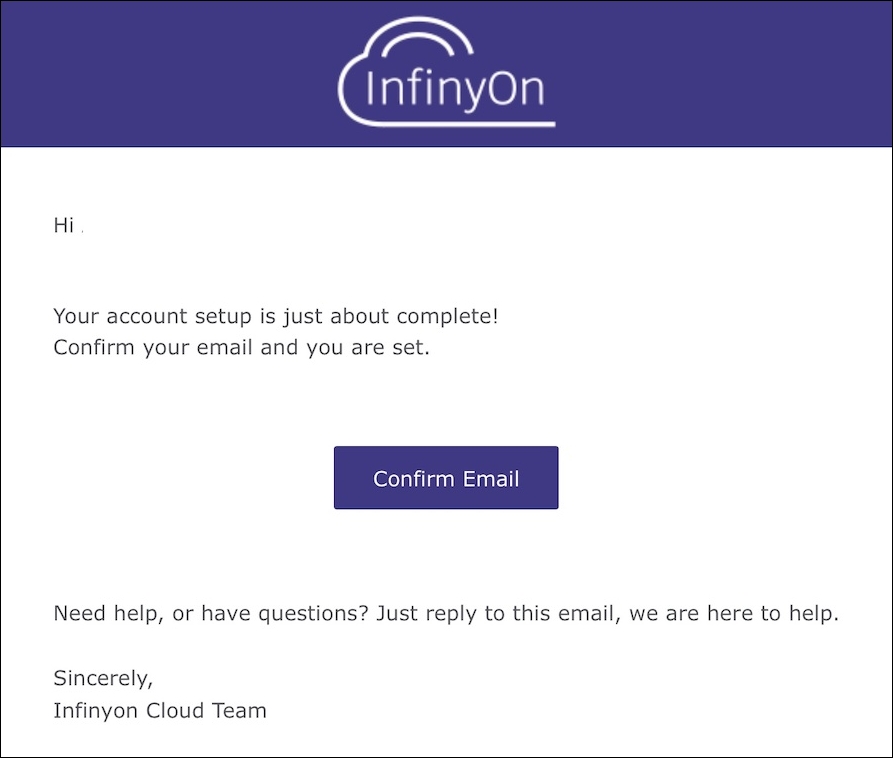
You should now get a confirmation that your account is ready to use.

At this point, you can log in via the Fluvio CLI and start sending and receiving messages to your Fluvio cluster.
Depending which method you chose in account creation, you will have the option of logging in with OAuth2, or username/password. Please follow the relevant steps to link the Cloud to your Fluvio CLI.
Use the command fluvio cloud login --use-oauth2 to connect to the InfinyOn Cloud.
$ fluvio cloud login --use-oauth2
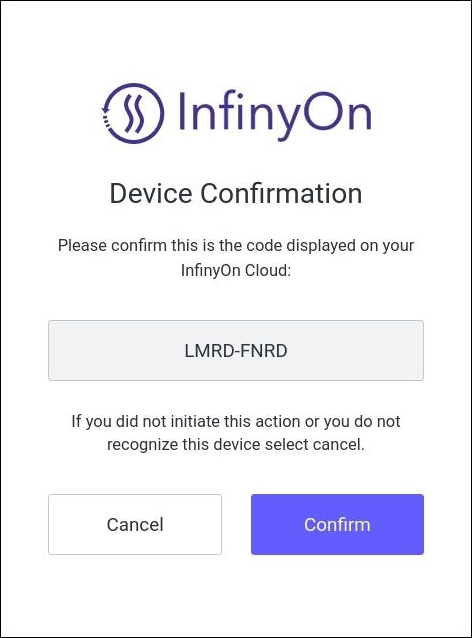
A web browser has been opened at https://infinyon-cloud.us.auth0.com/activate?user_code=GLMC-QDDJ.
Please proceed with authentication.
Fluvio will open a login screen in your browser. If it is unable to do so, copy the URL provided in the command prompt and enter it into your web browser manually.
Verify that the code matches what was displayed at the end of the URL in the command prompt, then click the Confirm button.
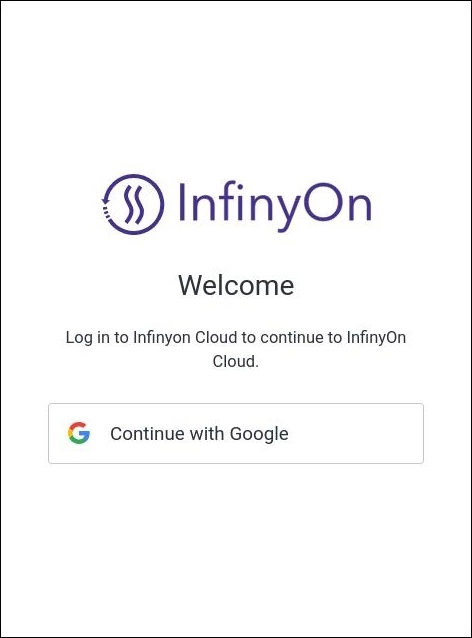
If you are not already logged into Google, the next step is to sign in.
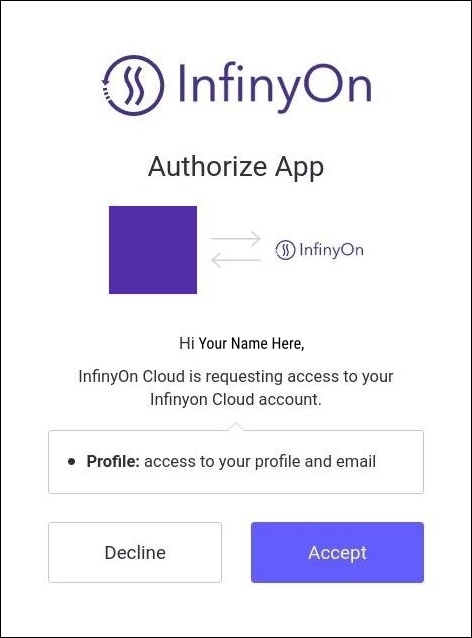
One last verification that you wish to authorize InfinyOn Cloud, click Accept.
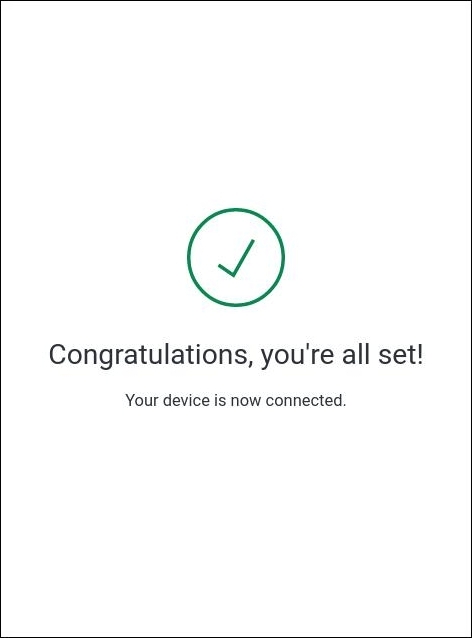
Congrats, everything is now set up!
Use the command fluvio cloud login to connect the InfinyOn Cloud to your
Fluvio CLI. It will ask for your account credentials, as seen below.
$ fluvio cloud login
InfinyOn Cloud email: John@example.com
Password:
You can now see Fluvio in action by creating a simple topic, and pushing data to it:
$ fluvio topic create greetings
topic "greetings" created
$ echo 'Hello world!' | fluvio produce greetings
$ fluvio consume greetings -dB
Hello world!
The storage and retrieval of records from the topic as shown above are basic actions of the Fluvio CLI.
Two core commands of Fluvio you will need to be familiar with are
fluvio produce <topic> and fluvio consume <topic>.
fluvio produce is the main way to get data into the Fluvio database. While
most of the time you may be calling it through an API, here is how to access it
through the CLI.
$ fluvio produce greetings
> test
Ok!
> meow
Ok!
>
fluvio produce <topic> [flags] can take input from stdin, or from a file. The
stdin input can be piped into, or filled continuously as seen just above. When
taking input continuously, it won’t stop until it is terminated by the user.
Some useful option flags to be aware of:
-f <file name>– uses a file as input to be read and uploaded as multiple records.--raw– specifies that the incoming data should be stored as a single record.--key-separator <key>– specifies the string delineator to split the input into a key and value pairing.
fluvio consume is the main way to read data from the Fluvio database. Either
in scripting, or through the use of the CLI, most interactions will use consume in some way.
Here is an example of consume in action:
$ fluvio consume greetings -dB
Consuming records from the beginning of topic 'greetings'
Hello world!
test
meow
fluvio consume <topic> [flags] by default prints new records to the terminal as
they enter the database. By default it runs nonstop until quit – the examples
used here all use the -d flag to tell it to stop.
Some useful option flags to be aware of:
-d– halts consumption after reaching the end of the records available.-T [int]– consumes only the specified most recent records (default 10).-B [int]– starts consuming records a specified offset after the start of the database (default 0).-p <int>– reads only from the specified partition.-k– displays the key portion of the key and value pairs.-A– reads from all partitions available.--smartmodule <module>– runs a SmartModule module on the output, then displays the results.
Now you have a fully setup Fluvio system, and you know the basic commands to get Fluvio working.
